


How to Convert DVD to Zune Format?
The Zune HD is a portable media player in the Zune product family released on September 15, 2009 by Microsoft. It is a direct competitor with the Apple iPod and iPhone series of mobile devices. It was initially released in 16 and 32 GB capacities. A 64 GB version was released on April 9, 2010. It utilizes a touchscreen interface for navigation and includes Wi-Fi for synchronization, access to the Zune Marketplace and Web browsing. The Zune HD utilizes the Nvidia Tegra APX 2600 chip, allowing it to play 720p video through the optional HDMI Zune dock on a high-definition television. Otherwise, content will be scaled down to 480x272 pixels on the player's OLED touchscreen. Zune supports WMV and MP4 video playing back. It is really convenient to use it for video playing back. However, have you ever had the desire of viewing DVD movies through Zune HD player? It seems impossible but actually it is very easy. All you need is only a proper DVD to Zune converter. Here in this guide, we take iCoolsoft DVD Ripper for example telling you how to convert DVD movies to Zune WMV or MP4 format so as to play back DVD movies through Zune HD easily.
Steps of converting DVD to Zune format
Follow this guide and you will find it very easy to convert DVD movies to the audio/video formats compatible with Zune players.
Step 1: Download iCoolsoft DVD Ripper for free, then install and launch this tool.
Step 2: Click ![]() button and choose "Load DVD", then select your DVD driver and click "OK".
button and choose "Load DVD", then select your DVD driver and click "OK".
Tip: After loading the DVD, you can preview it in the preview pane and take snapshot of the scenes you like by using the Camera button. To set the format and the output folder for the pictures snapped, you can click button ![]() and set in the General page.
and set in the General page.
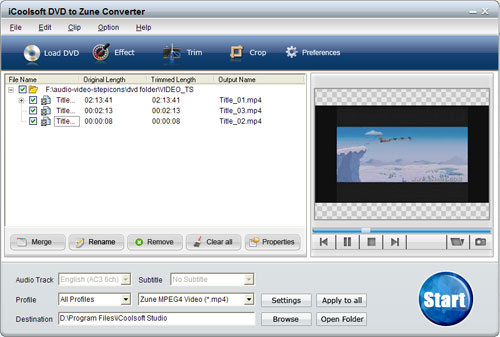
Step 3: Select Audio Track and Subtitle. Choose the output format from "Profile" drop-down list. Click "Apply to all" to set the format for all source videos. Click "Browse" button to set output folder. Use "Open Folder" to quickly open that folder.

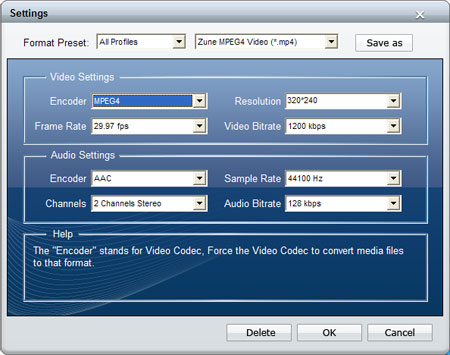
Tip: You can also set the output folder by clicking button "Settings". In the "Settings" window, you can set other output parameters if you like.
Step 4: Click  button to start converting DVD to Zune format.
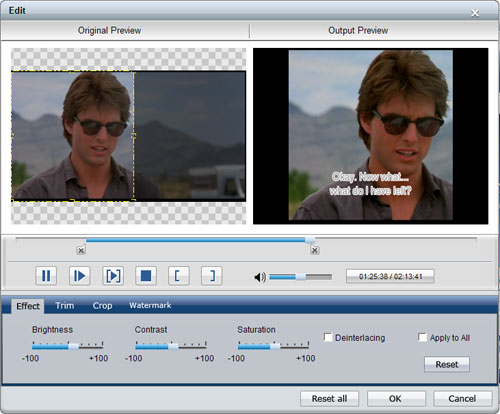
Tips: If you would like to edit the DVD movie before converting, you can select the title/chapter and click "Effect", "Trim", or "Crop" button. In the popped out "Edit" window, you can adjust the Brightness, Contrast, and Saturation of the DVD; trim any time length of clips to convert only or delete from the file you want to rip; crop displaying area to get rid of black borders or zoom in some part of the image; select Aspect Ratio; and add text/picture watermark.