


How to Convert WMV Files to iTunes Format?
Windows Media Video (WMV) is a video compression format for several proprietary codecs developed by Microsoft. It takes small space and has been widely accepted by many media players and devices. However, if you want to play back WMV files with iTunes, you have to take some time to convert WMV files to the formats compatible with iTunes because it is not compatible with iTunes. In that case, a professional WMV to iTunes converter is what you could use. iCoolsoft Total Video Conveter is a great choice because it could support many inputting and outputting formats. In addition, it supports batch conversion so you could add and convert several video files at the same time, even convert different video files to different formats at the same time. The conversion speed of that software is versy fast so you don't have to wait very long to convert WMV to iTunes format. Free download its trial version to have a try. You will find it is very easy to use.
![]()
Step 1: Click "Add Video" button to add the WMV videos you would like to convert. You can also use the "File" menu or drag files into the interface directly.
Tip:
You can preview the added WMV file in the preview pane and take snapshot of the scenes you like the most. Click button "Camera" and the picture being displayed will be saved as default format in default folder. Click "Preferences" button to change the format and folder if you need.
.jpg)
Step 2: Open "Profile" drop-down list and select the format compatible with iTunes as the output format. Click "Browse" button to specify the destination.
Step 3: Select a WMV video and use "Effect, Trim, Crop" buttons on the tool bar to edit videos as you like.
> Effect
You can click button "Effect" to adjust Brightness, Contrast and Saturation. You can also check "Deinterlacing" checkbox to avoid mosaic and improve the quality of the video.
.jpg)
> Trim
If you only want to convert a segment of the entire video or do not want to convert some certain segment of the video, you can use the trim function. Click button "Trim" and play the video in the Edit window. You can either drag ![]() and
and ![]() or click
or click  and
and  to set the start time and the end time of the clip. Besides, you can also input the exact start time and end time or one of them and the time duration.
.jpg)
> Crop
To get rid of the black border or to zoom in some part of the scene, you can click button "Crop" and then drag the yellow frame or adjust the values in the boxes. You can also select "Full Screen", "Keep Original", "16:9" or "4:3" from the drop-down list of "Zoom Mode".
.jpg)
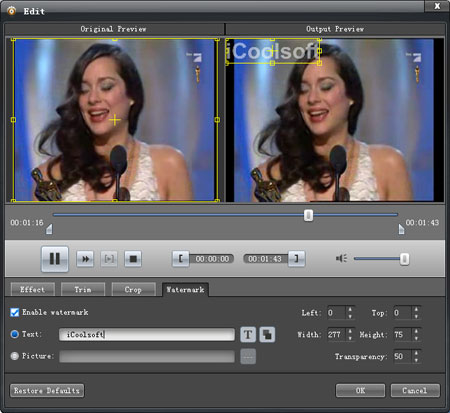
> Watermark
You can add text or picture watermark to the video. Check "Enable Watermark" and then "Text", input what you want to add in the blank. To add picture watermark, you have to check "Picture" and click button ![]() to find the picture in your local disc. Dragging or adjusting the values in the boxes can help you to locate the watermark at the place you prefer.
to find the picture in your local disc. Dragging or adjusting the values in the boxes can help you to locate the watermark at the place you prefer.
Step 4: Click "Convert" button to start converting WMV files into the format compatible with iTunes.
Related articles:
How to Convert FLV Video to iTunes Format?
How to Convert VOB to iTunes MP4/MOV Format?